


So far, we've learned how to customize our application form. It's time to get into writing C# code.
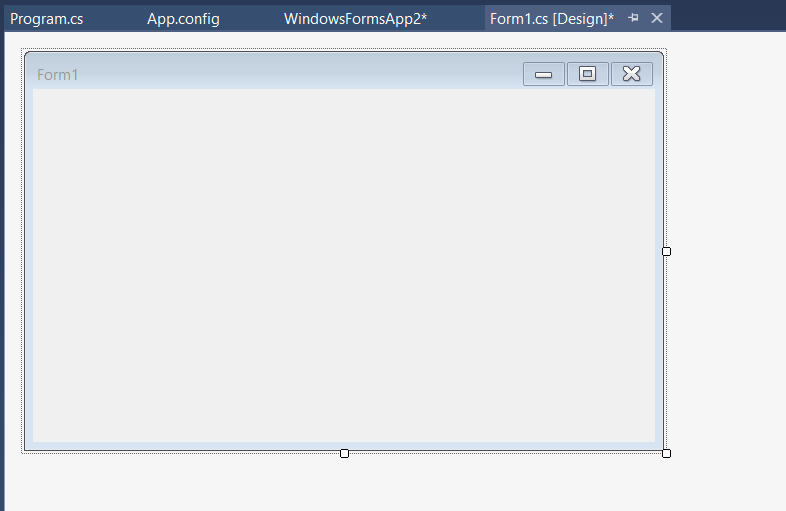
Start a new project from scratch, and then set the size of the form to 640x400 pixels. Refer to the previous tutorial if you have forgotten how to do that.
It's a good form size, because we will add more and more user interface elements to it, as we expand the functionality of our applications.
Here's how the form should look like.

Buttons and MessageBoxes
Copyright
Matthew S. Alford
All Rights reserved.
Matthew S. Alford
All Rights reserved.

- Custom small business software
- Affordable prices
- Affordable prices
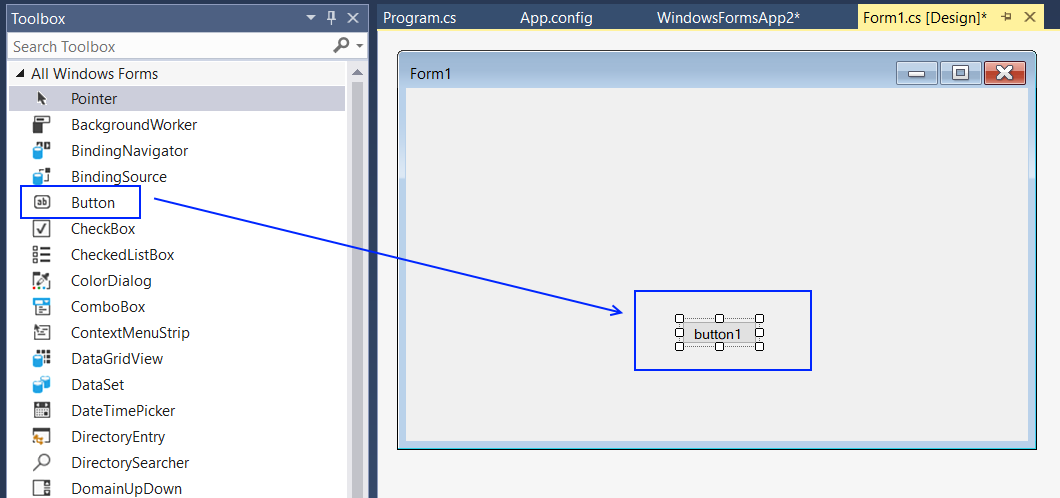
We will add a button to the form. The toolbox that contains all the user interface elements and controls is located on the left side of the screen. By default, the controls are grouped into categories, but they're quite difficult to navigate this way.
I like to hide all the categories by clicking the small triangle on their left, and only keep expanded the "All Windows Forms" category, which includes them all, and lists them alphabetically.
So, do this right now, and then come back. I will be waiting for you.
Ok, so now you can see all the controls. We will use the "Button" control to place a button on our form. Click the "Button" control, and then drag it (without releasing the left mouse button) to the form. Don't worry about its exact destination area, we can easily change that later on. For now, all we need to make sure is that our button has been created inside the form.
Now that our button is here, we can move it anywhere we want by clicking and dragging it around. Feel free to play with it and move it where it looks good; its exact position isn't important for this tutorial.
Aren't you excited to start your C# programming journey? Double click the button, and you will see its associated code show up.
Aren't you excited to start your C# programming journey? Double click the button, and you will see its associated code show up.
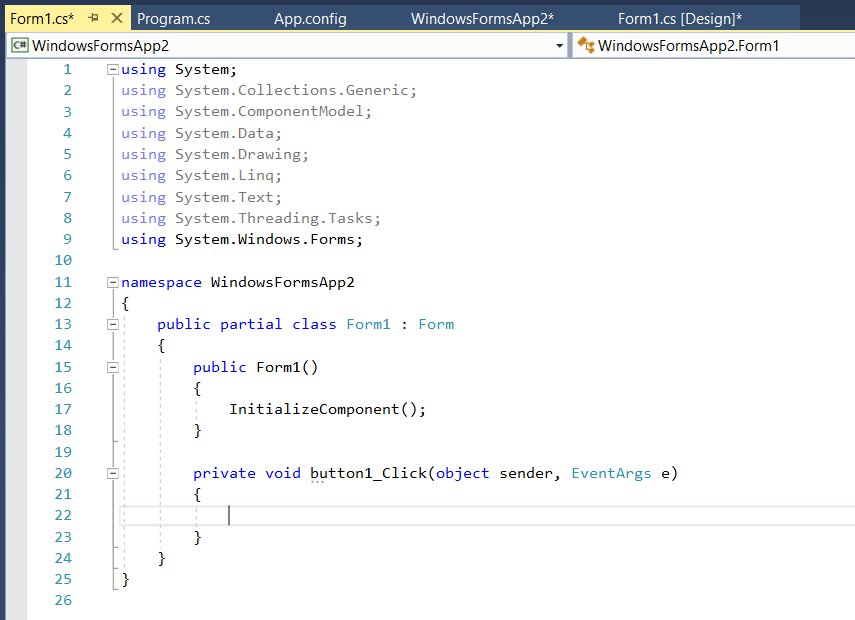
Well, to tell you the entire truth, this is the code that gets executed when people click the button. Don't be scared by those ugly looking lines of code; all you need to know is that the code that you are going to insert between those two curly brackets below will be executed anytime the button is clicked.
private void button1_Click(object sender, EventArgs e)
{
// the code placed here will be executed whenever you press the button
}
Yes, we can place our own comments in the code, without destroying its functionality. Just be sure to add two forward slashes in front of any line that is supposed to be ignored by Visual Studio. This way, you can revisit your code much later, and still understand how it works, because you've added those useful comments to it.
We will add a single line of code to our application, and then call it a day. Rome wasn't built in a single day, after all.
Here's the line of code that needs to be added inside those curly brackets.
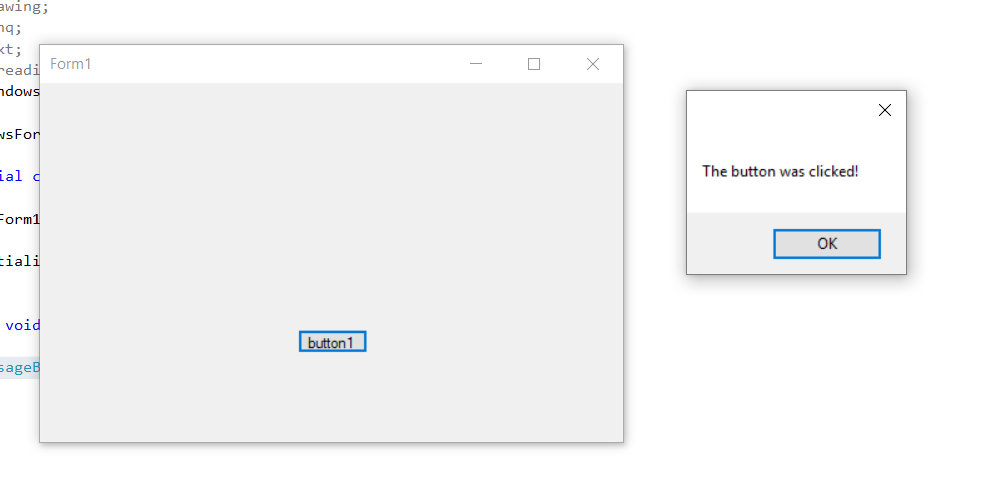
MessageBox.Show("The button was clicked!");
We can learn quite a few things from this single line. The MessageBox instruction is used to display small message boxes on the screen. They are widely used to display information or errors in Windows, for example. I am sure that you have seen them when a message pops up, asking you if you really want to shut down an application, and giving you the option of picking either "OK" or "Cancel".
MessageBox.Show will display a message box that's similar with those warning boxes. It needs a message that will be displayed, and all messages must be placed between a pair of quotes. We want to display a "The button was clicked!" message here.
Finally, and equally important, most C# lines of code end with a semicolon. Not all of them, but most of them.
Okay, let's run our application! If everything went well, you will see our form with the button added to it, and if you click the button, the message box will show up.
private void button1_Click(object sender, EventArgs e)
{
// the code placed here will be executed whenever you press the button
}
Yes, we can place our own comments in the code, without destroying its functionality. Just be sure to add two forward slashes in front of any line that is supposed to be ignored by Visual Studio. This way, you can revisit your code much later, and still understand how it works, because you've added those useful comments to it.
We will add a single line of code to our application, and then call it a day. Rome wasn't built in a single day, after all.
Here's the line of code that needs to be added inside those curly brackets.
MessageBox.Show("The button was clicked!");
We can learn quite a few things from this single line. The MessageBox instruction is used to display small message boxes on the screen. They are widely used to display information or errors in Windows, for example. I am sure that you have seen them when a message pops up, asking you if you really want to shut down an application, and giving you the option of picking either "OK" or "Cancel".
MessageBox.Show will display a message box that's similar with those warning boxes. It needs a message that will be displayed, and all messages must be placed between a pair of quotes. We want to display a "The button was clicked!" message here.
Finally, and equally important, most C# lines of code end with a semicolon. Not all of them, but most of them.
Okay, let's run our application! If everything went well, you will see our form with the button added to it, and if you click the button, the message box will show up.
I'd say that you have done a great job! If you get errors, you didn't type in the line of code exactly like above. MessageBox and Messagebox are different, for example. Or maybe you have forgotten the semicolon at the end of the line. If you can't get things to work, you can copy/paste the line of code above. Then, after you get the application to run, delete the line and type it in yourself. This is by far the best way of learning programming.
I hope that you liked this tutorial. Stay tuned, because I've got more quality stuff for you.
I hope that you liked this tutorial. Stay tuned, because I've got more quality stuff for you.