


Welcome back! This tutorial will teach you how to tweak the settings of your form. We won't get into code writing yet; don't worry, we will start playing with code in the next tutorial.
The form is the user interface of our application; it's what the users see when they run the program. Visual Studio allows us to tweak lots of form settings; I'll show you where you can find them all, and we'll play with a few of the most important ones.
To get started, you should create a new project, just like we did it in the previous tutorial. Then, double click the "Form1.cs" file in the Solution Explorer to access its properties, in the window that shows up at the bottom right corner of the screen.

Changing form properties
Copyright
Matthew S. Alford
All Rights reserved.
Matthew S. Alford
All Rights reserved.

- Custom small business software
- Affordable prices
- Affordable prices
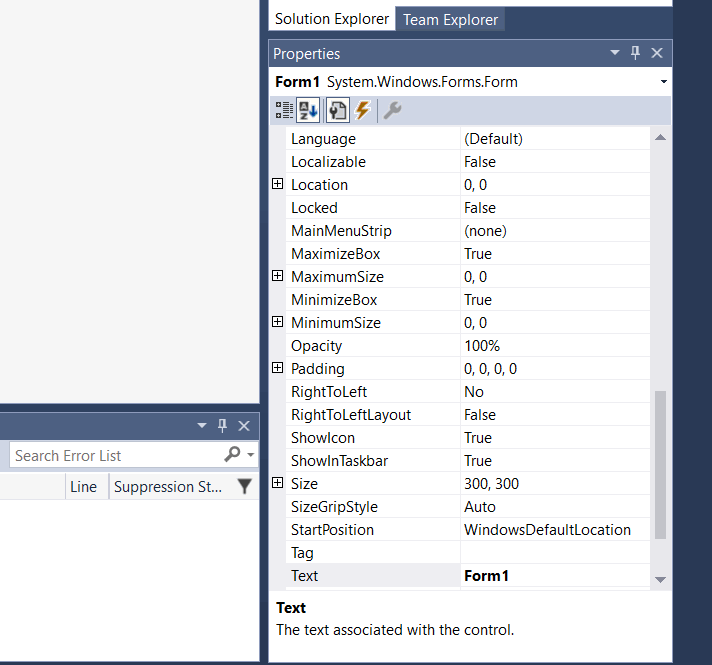
Here are the most important properties that you should play with:
- "Language" sets the language of your application. It is set to "(Default)" by default, which means that it will use the predefined system settings. However, if you want to code an application for a Chinese customer, for example, you can click the drop-down menu and pick "Chinese" from the language list. This way, you will be able to use Chinese text labels and information for your application, and your customers will be able to input their data using the Chinese alphabet.
- "Location" sets the initial position of your application on the screen. It is set to (0,0) by default, which means that it will be displayed in the upper left corner of the screen. Your program can be moved around, of course, unless you prevent it from doing that.
- "MaximizeBox" allows your application to be maximized. Sometimes you will build a small tool which looks great in a small window, but has too few user interface elements to look great in full screen mode. In this case, you will want to set MaximizeBox to "False".
- "MaximumSize" is the alternative to setting MaximizeBox to False. It allows you to specify the maximum size that your application can have. The "Width" and "Height" parameters can be modified individually.
- "MinimumSize" is the reverse of MaximumSize, allowing you to set the minimum width/height of your program window.
- "Opacity" sets the transparency level of your form. Sometimes you will want to create an application that is transparent, allowing its users to see through it. In this case, an opacity value of 20...70% (rather than the predefined 100%) will do the job.
- "Padding" sets the predefined amount of space around each control (button, label, etc.) that is placed on the form. By default, you can cram the user interface elements as tight as you want; by setting padding to a non-zero value, you will be able to give the UI elements some breathing space, without having to drag them exactly where you want them to be, during the first stages of the project.
- "ShowIcon" can display (True) or hide (False) the application icon in its status bar. It's good to keep this value set to True, especially if you have taken the time to design a nice looking icon for your program.
- The last form property setting that will be discussed in this article is "Size", the size of your application. By default, Windows Forms applications have a size of 300x300 pixels, but you can change it to any other value by specifying other dimensions for width and height.
Let's set the size to 640x400 pixels; that is a decent size for a small tool. Make the changes and you will instantly see the new size of the form.
Don't forget that most of the form properties also apply to controls (buttons, etc). Each control has its own particularities, of course, but by learning the most used settings, you'll be able to apply them to lots of user interface elements.
I hope that you have enjoyed the form properties tutorials. I'll see you next time!
I hope that you have enjoyed the form properties tutorials. I'll see you next time!
