


Welcome to my first C# tutorial. Don't worry, I will try to keep things as easier as possible on your end.
To get started, you will need to download Visual Studio, aka VS. It's a freemium product; you can get a version that's got less features, but it's 100% free, or you can pay to get more features and tech support.
Microsoft has made a daring move when it decided to release VS for free a while ago, but let's admit that MS is doing lots of great things lately.
So, the good news is that Visual Studio can be downloaded for free. Visit this URL https://www.visualstudio.com/, and then download the community version - that's the free one.
Install the application (could take a while), and then run it. Pick C# as your preferred programming language; this will make it easier to start future projects, without limiting your ability to program using other languages in the future.
Most people will start teaching others how to program using console applications. They are quite ugly, reminding me of the old DOS programs, so we won't go that route. Why work in an ugly looking environment, and then learn how to port your programs to a user-friendly interface?
So, we will learn to create Windows Forms applications right off the bat; they're the type of nice looking applications that run on your Windows computer: Microsoft Word, Excel, Media Player, etc.
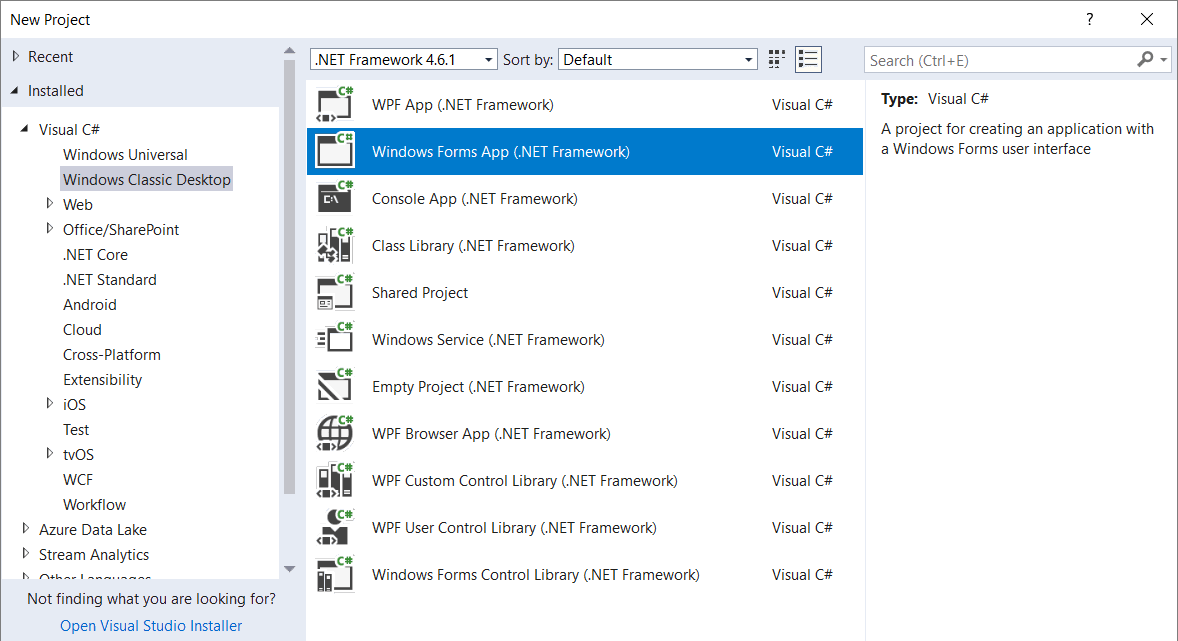
To create a Windows Forms application, choose "File", "New", and then "Project" from the top menu. Pick "Windows Classic Desktop", and then "Windows Forms App (.NET Framework)". Take a look at the picture below, which shows the needed steps.
To get started, you will need to download Visual Studio, aka VS. It's a freemium product; you can get a version that's got less features, but it's 100% free, or you can pay to get more features and tech support.
Microsoft has made a daring move when it decided to release VS for free a while ago, but let's admit that MS is doing lots of great things lately.
So, the good news is that Visual Studio can be downloaded for free. Visit this URL https://www.visualstudio.com/, and then download the community version - that's the free one.
Install the application (could take a while), and then run it. Pick C# as your preferred programming language; this will make it easier to start future projects, without limiting your ability to program using other languages in the future.
Most people will start teaching others how to program using console applications. They are quite ugly, reminding me of the old DOS programs, so we won't go that route. Why work in an ugly looking environment, and then learn how to port your programs to a user-friendly interface?
So, we will learn to create Windows Forms applications right off the bat; they're the type of nice looking applications that run on your Windows computer: Microsoft Word, Excel, Media Player, etc.
To create a Windows Forms application, choose "File", "New", and then "Project" from the top menu. Pick "Windows Classic Desktop", and then "Windows Forms App (.NET Framework)". Take a look at the picture below, which shows the needed steps.

A quick introduction to Visual Studio
Copyright
Matthew S. Alford
All Rights reserved.
Matthew S. Alford
All Rights reserved.

- Custom small business software
- Affordable prices
- Affordable prices
Choose a name for your application, and then hit the "OK" button. Wait a few seconds, until Visual Studio will create the project for you.
If you've ever played with code before, it is important to understand that modern IDEs (integrated development environments) such as VS use projects to store your applications, even if you'd only need a single file to store the needed code.
The blue rectangle in the image below highlights all the files and settings that are included in any project by default.
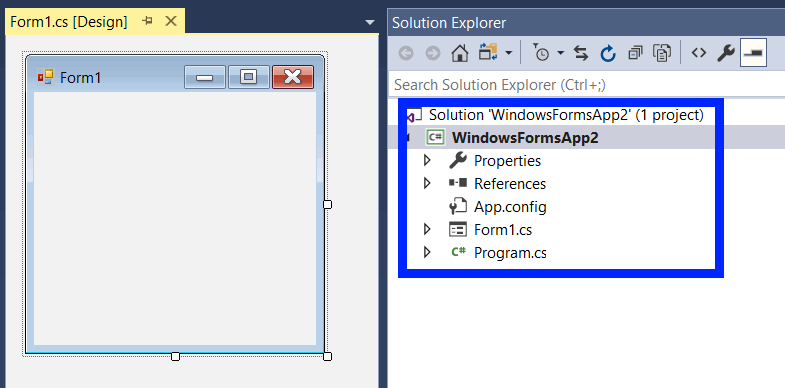
You can double click any of them to examine its properties.
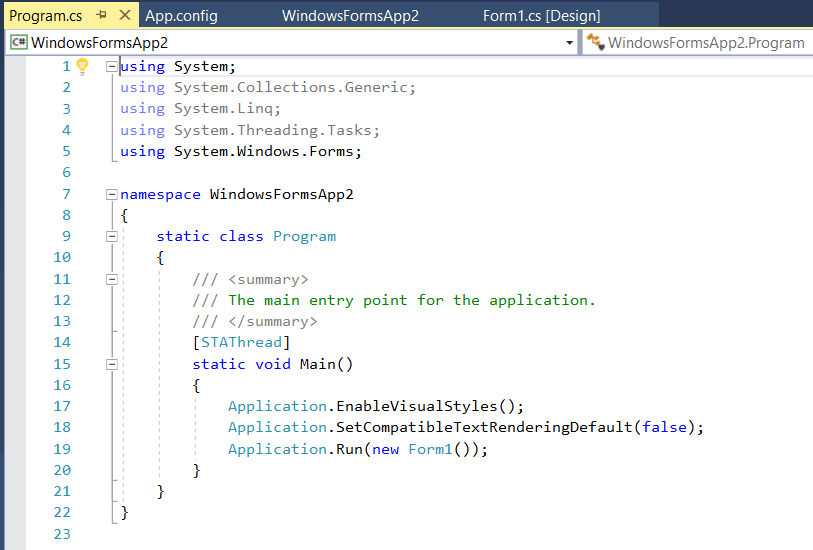
This way, you can change the project name later on, if you feel the need to do so. Most of the time, you will want to edit the form (using the WYSIWYG interface) and the source code, which is included in the Program.cs file for this project.
Double click Program.cs and you will see its source code.
This way, you can change the project name later on, if you feel the need to do so. Most of the time, you will want to edit the form (using the WYSIWYG interface) and the source code, which is included in the Program.cs file for this project.
Double click Program.cs and you will see its source code.
It's time to test our application! Press the "Start" button at the top and you will see the result of your work in its full splendor.
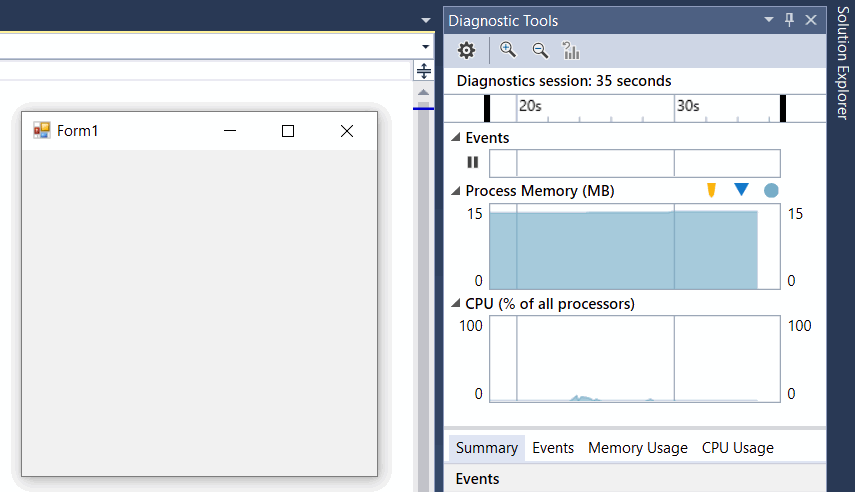
Ok, so our application doesn't do anything useful it. That's a normal thing, because we didn't customize its code yet. We will get into that in the following tutorials, of course.
Also, note the "Diagnostic Tools" window on the right side of the screen. They show you the amount of memory and CPU power that are used by your application. If you see that the "Process Memory (MB)" value is constantly growing, for example, you can be pretty sure that your application is misbehaving.
There are special situations when things like these will happen naturally. You could create an application that allocates large amounts of memory to store the data that's read from a huge database. Still, these are often time transient application behaviors.
This concludes our first C# tutorial. I hope that you are excited to learn more! Join me again in our next tutorial, when we will start tweaking the application form (the user interface).